
I wanted to pop the question to my bridesmaids in a cute, personal way, so I created these easy DIY bridesmaid proposal boxes.
Let me start by saying, I’m not a crafty person. But I wanted to come up with an idea for “proposing” to my bridesmaids that was easy for me to make and fun for my girls.
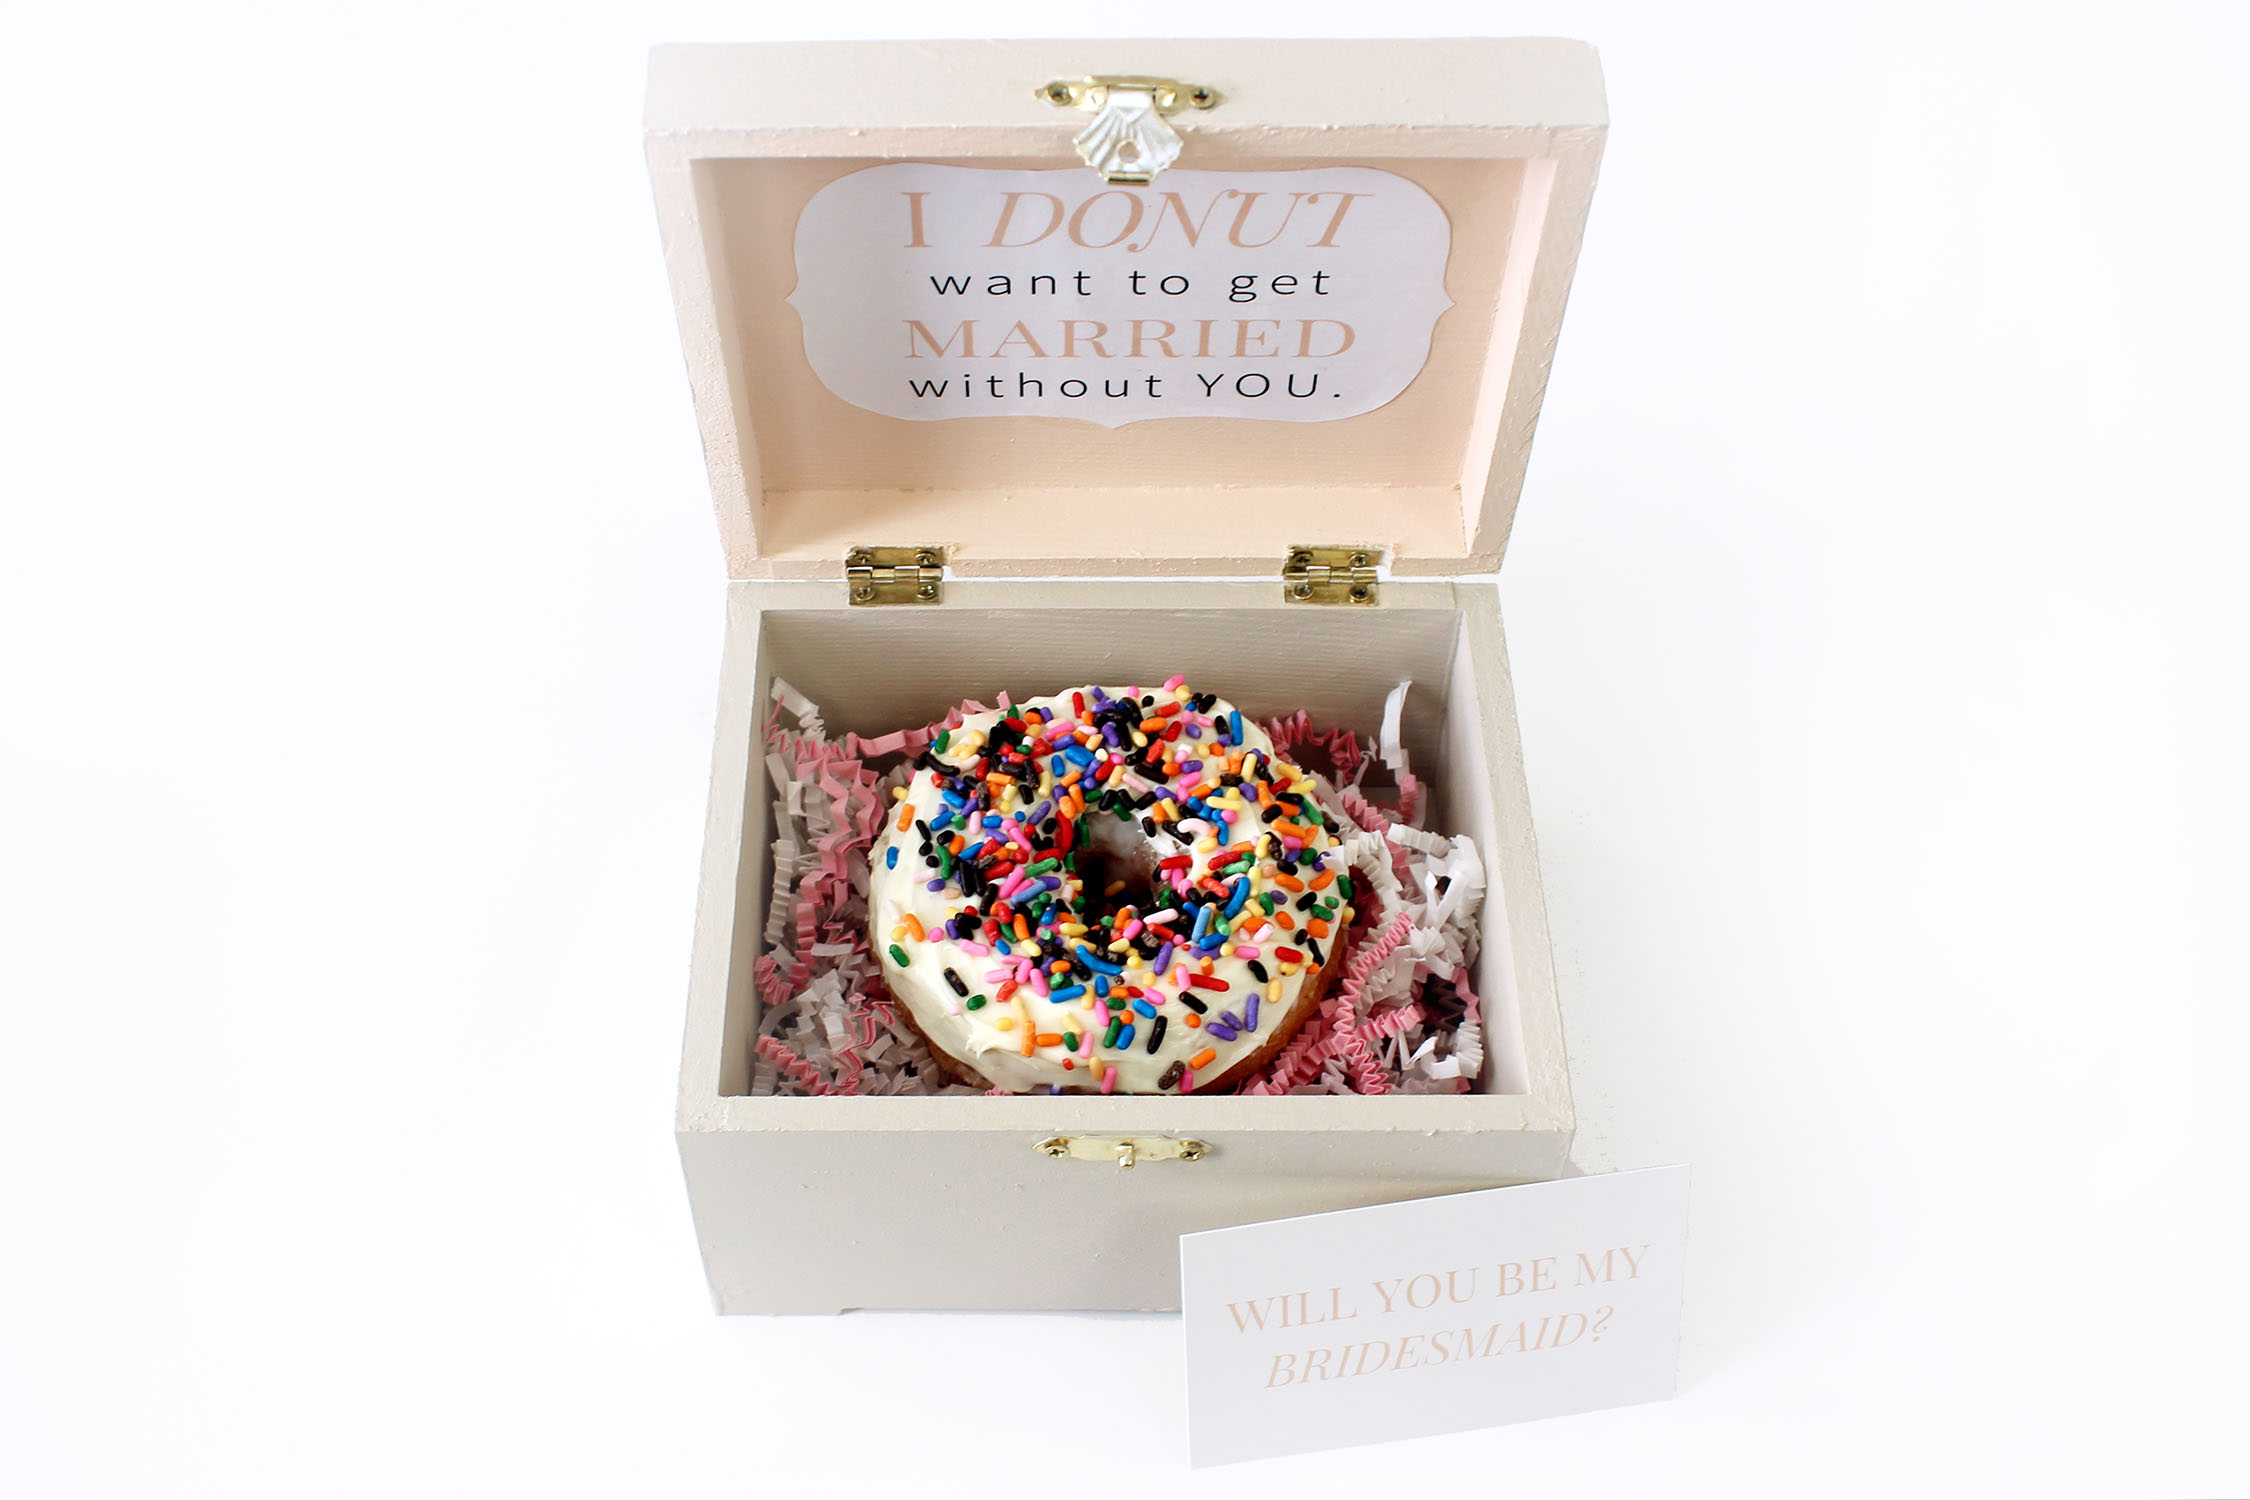
When researching DIY bridesmaid proposal ideas, I came across a bridal shower sign on Pinterest that read, “I Donut Want to Get Married Without You.” A donut and a pun seemed like the perfect combination, so I ran with it and decided to create cute jewelry boxes. I enlisted the help of my mom and we spent an afternoon painting the six boxes together. Keep reading to learn how to make these sweet boxes for your bridesmaids.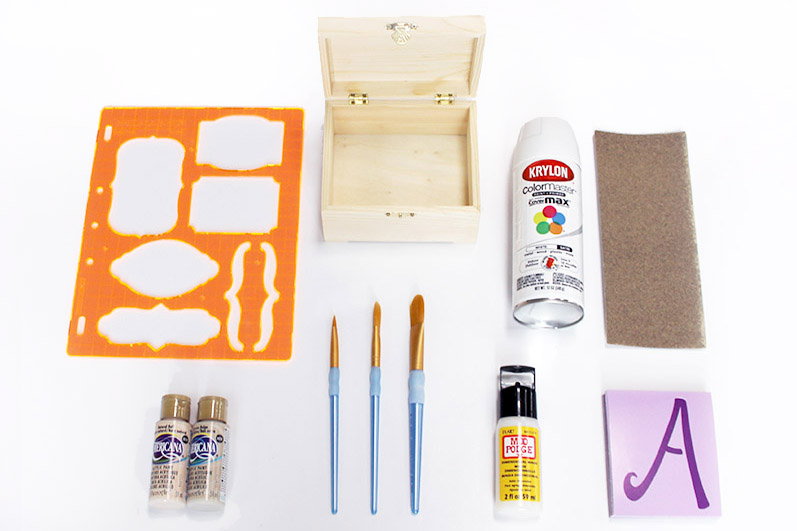
DIY Bridesmaid Proposal Box Supplies
- Unfinished wooden boxes
- Primer
- Acrylic paint
- Paint brushes
- Painters tape
- Sandpaper
- Letter stencils
- Modge podge
- Scissors
- Decorative stencil
- Printer paper and/or cardstock
- Laminator machine (optional)
- Confetti
- Donuts ;)

Step 1
Use 150-grit sandpaper to remove rough spots on the boxes (we don’t want any splinters!).
Step 2
Cover anywhere on the box you don’t want to be painted with painters tape. For these boxes, that meant covering the gold clasp on the front and the hinges on the back.
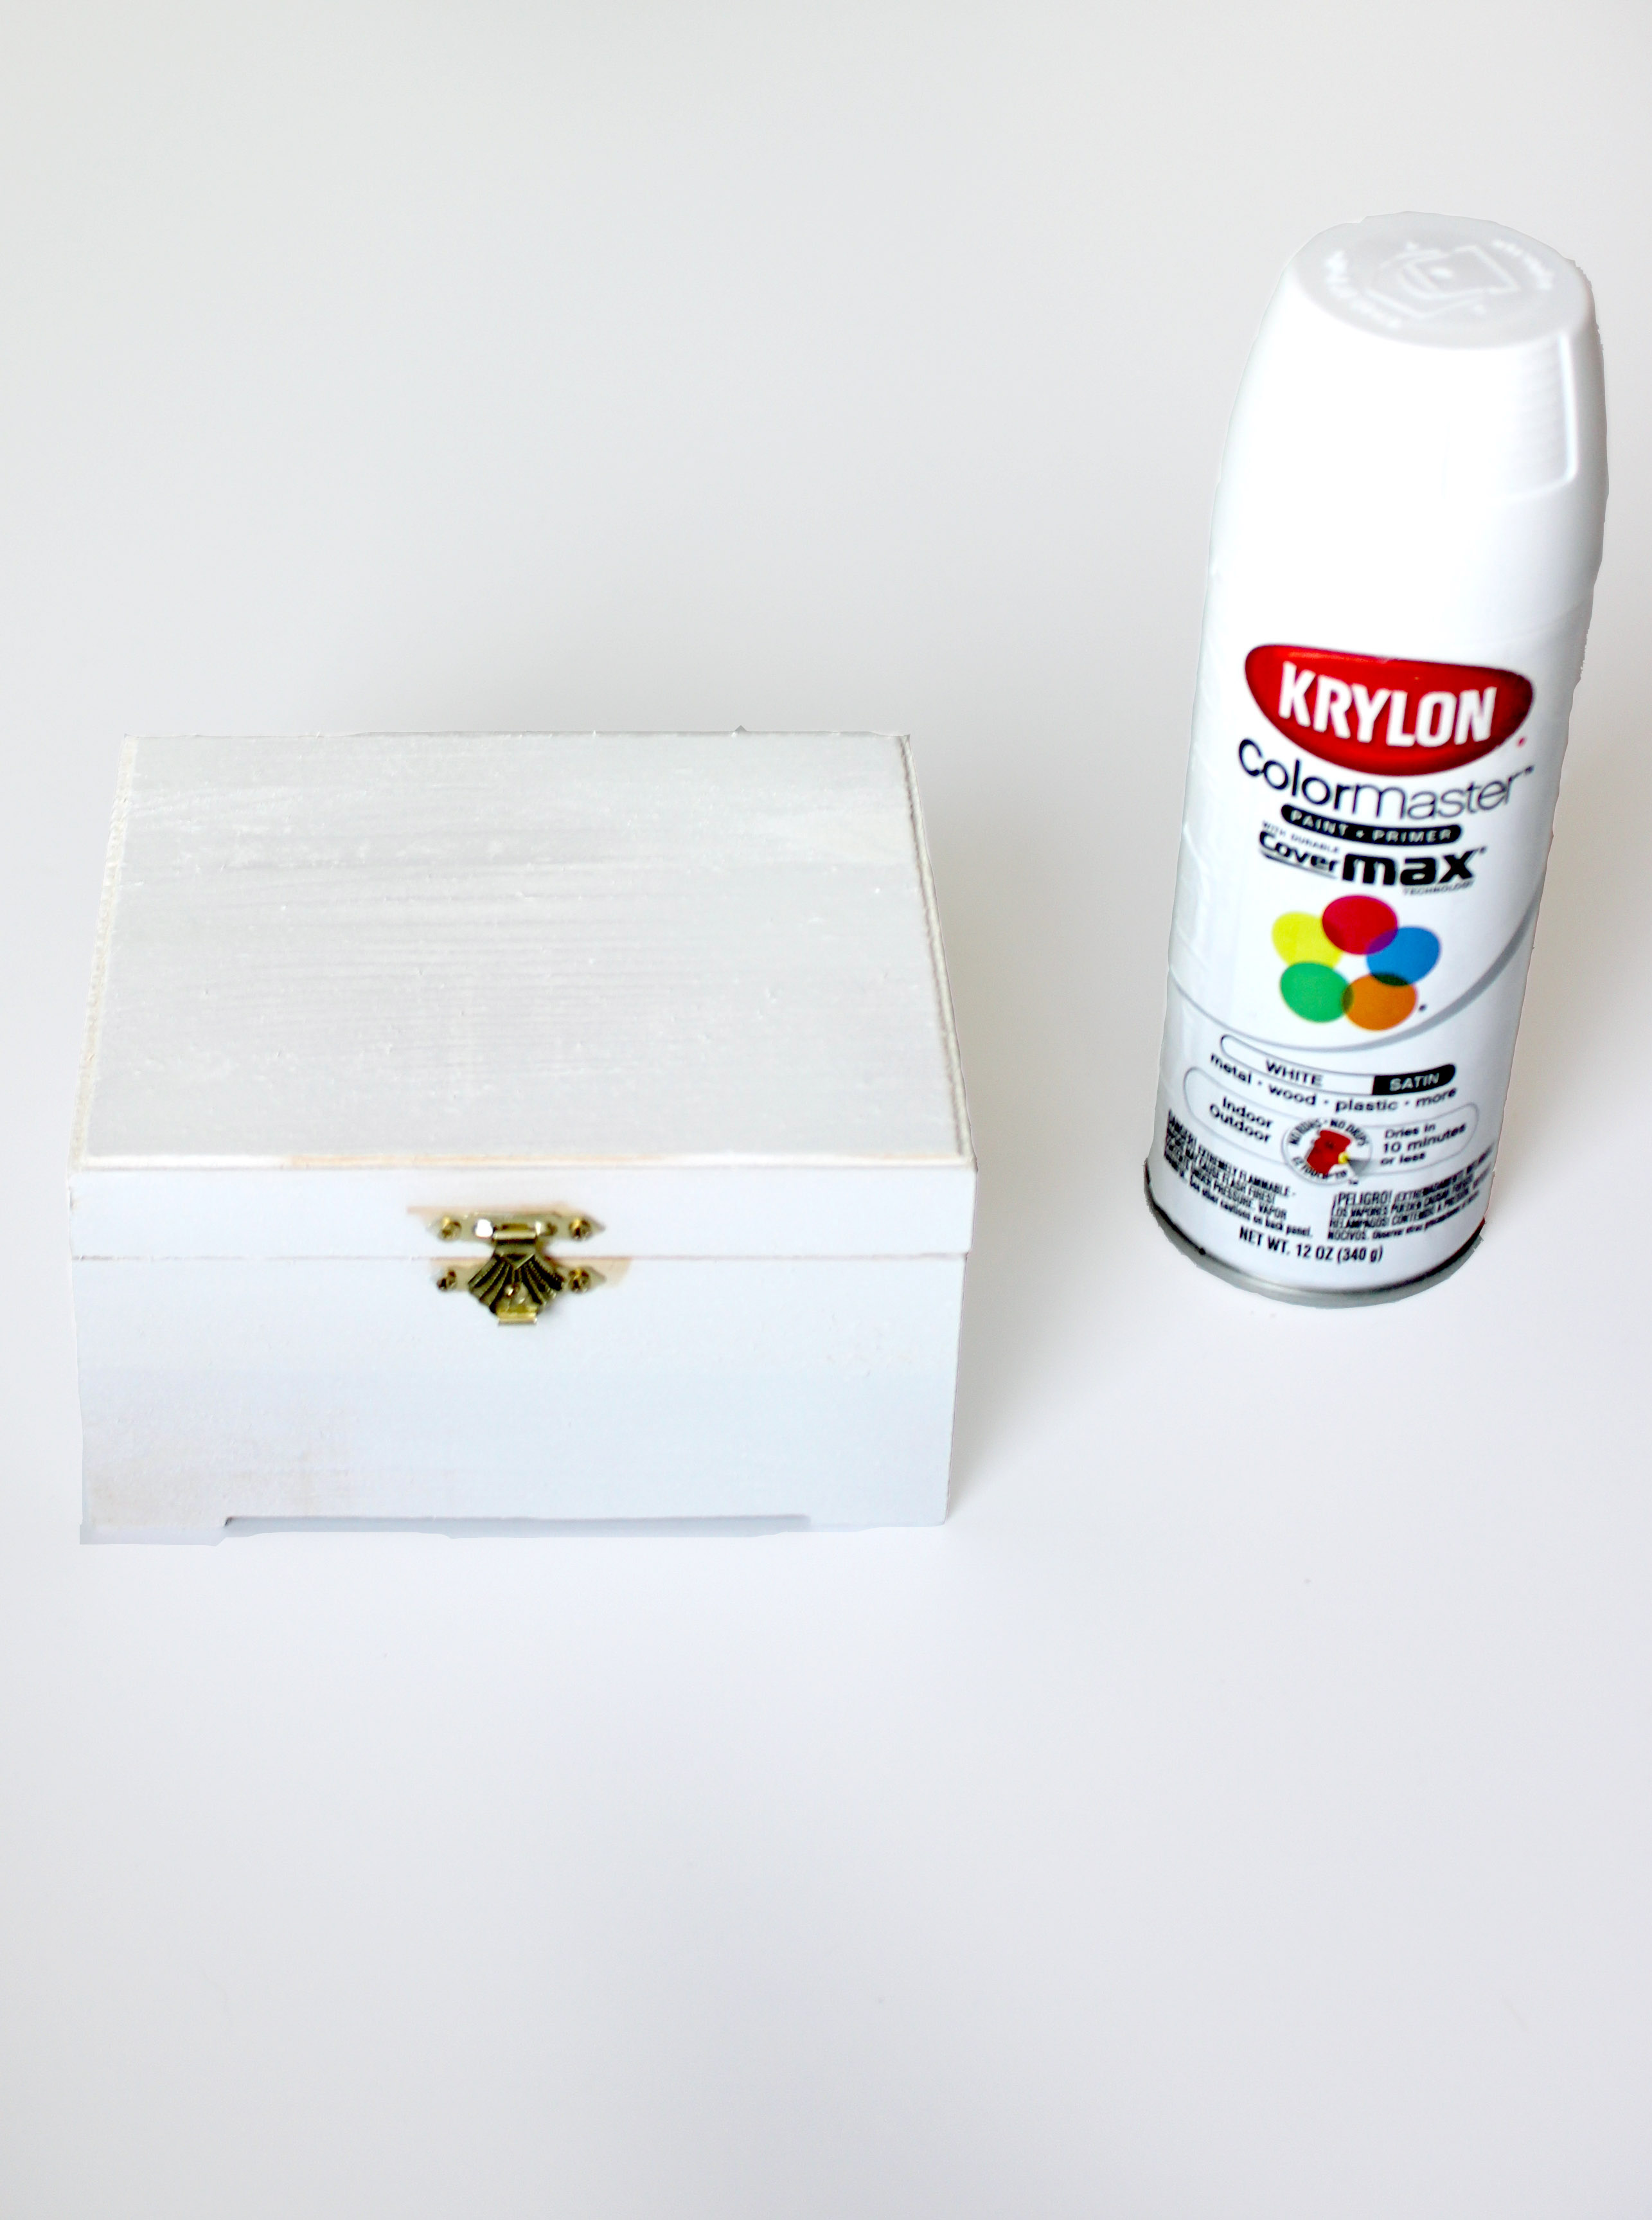
Step 3
Prime both the inside and outside of each box in two coats. We did this on a folding table we covered with a plastic tablecloth in the garage to avoid making a mess in the house. Let the primer dry completely before moving on to the next step.
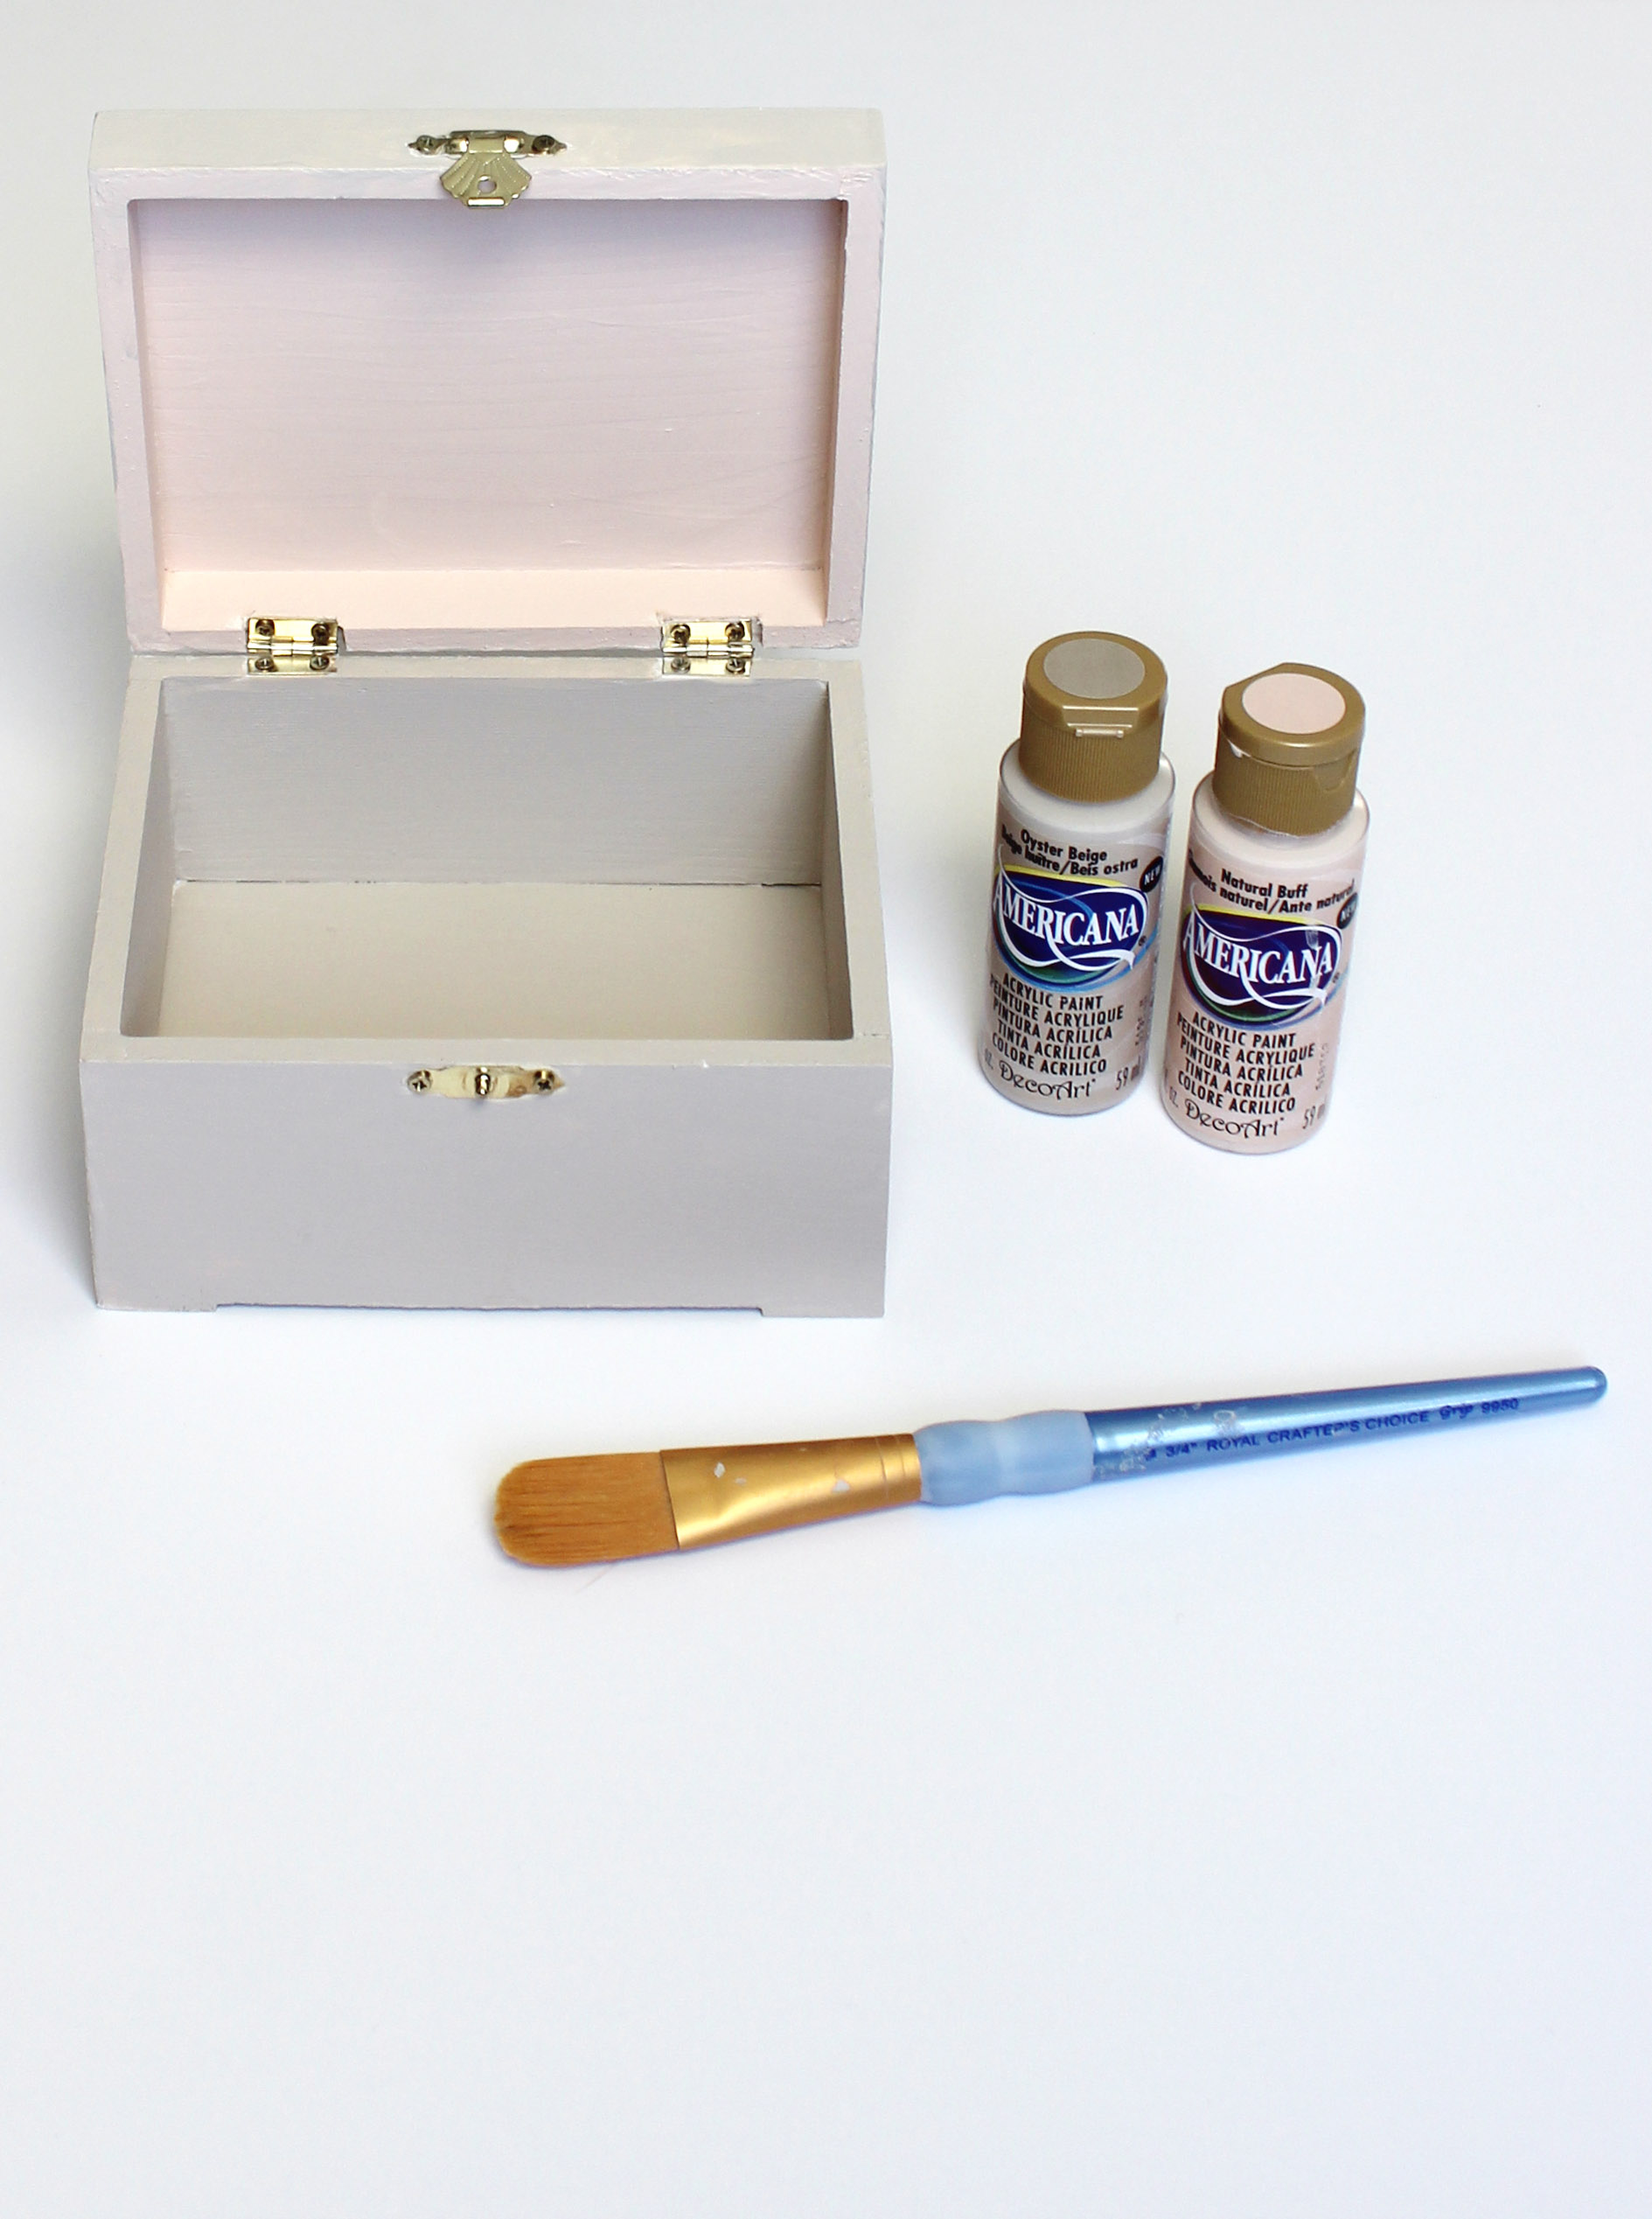
Step 4
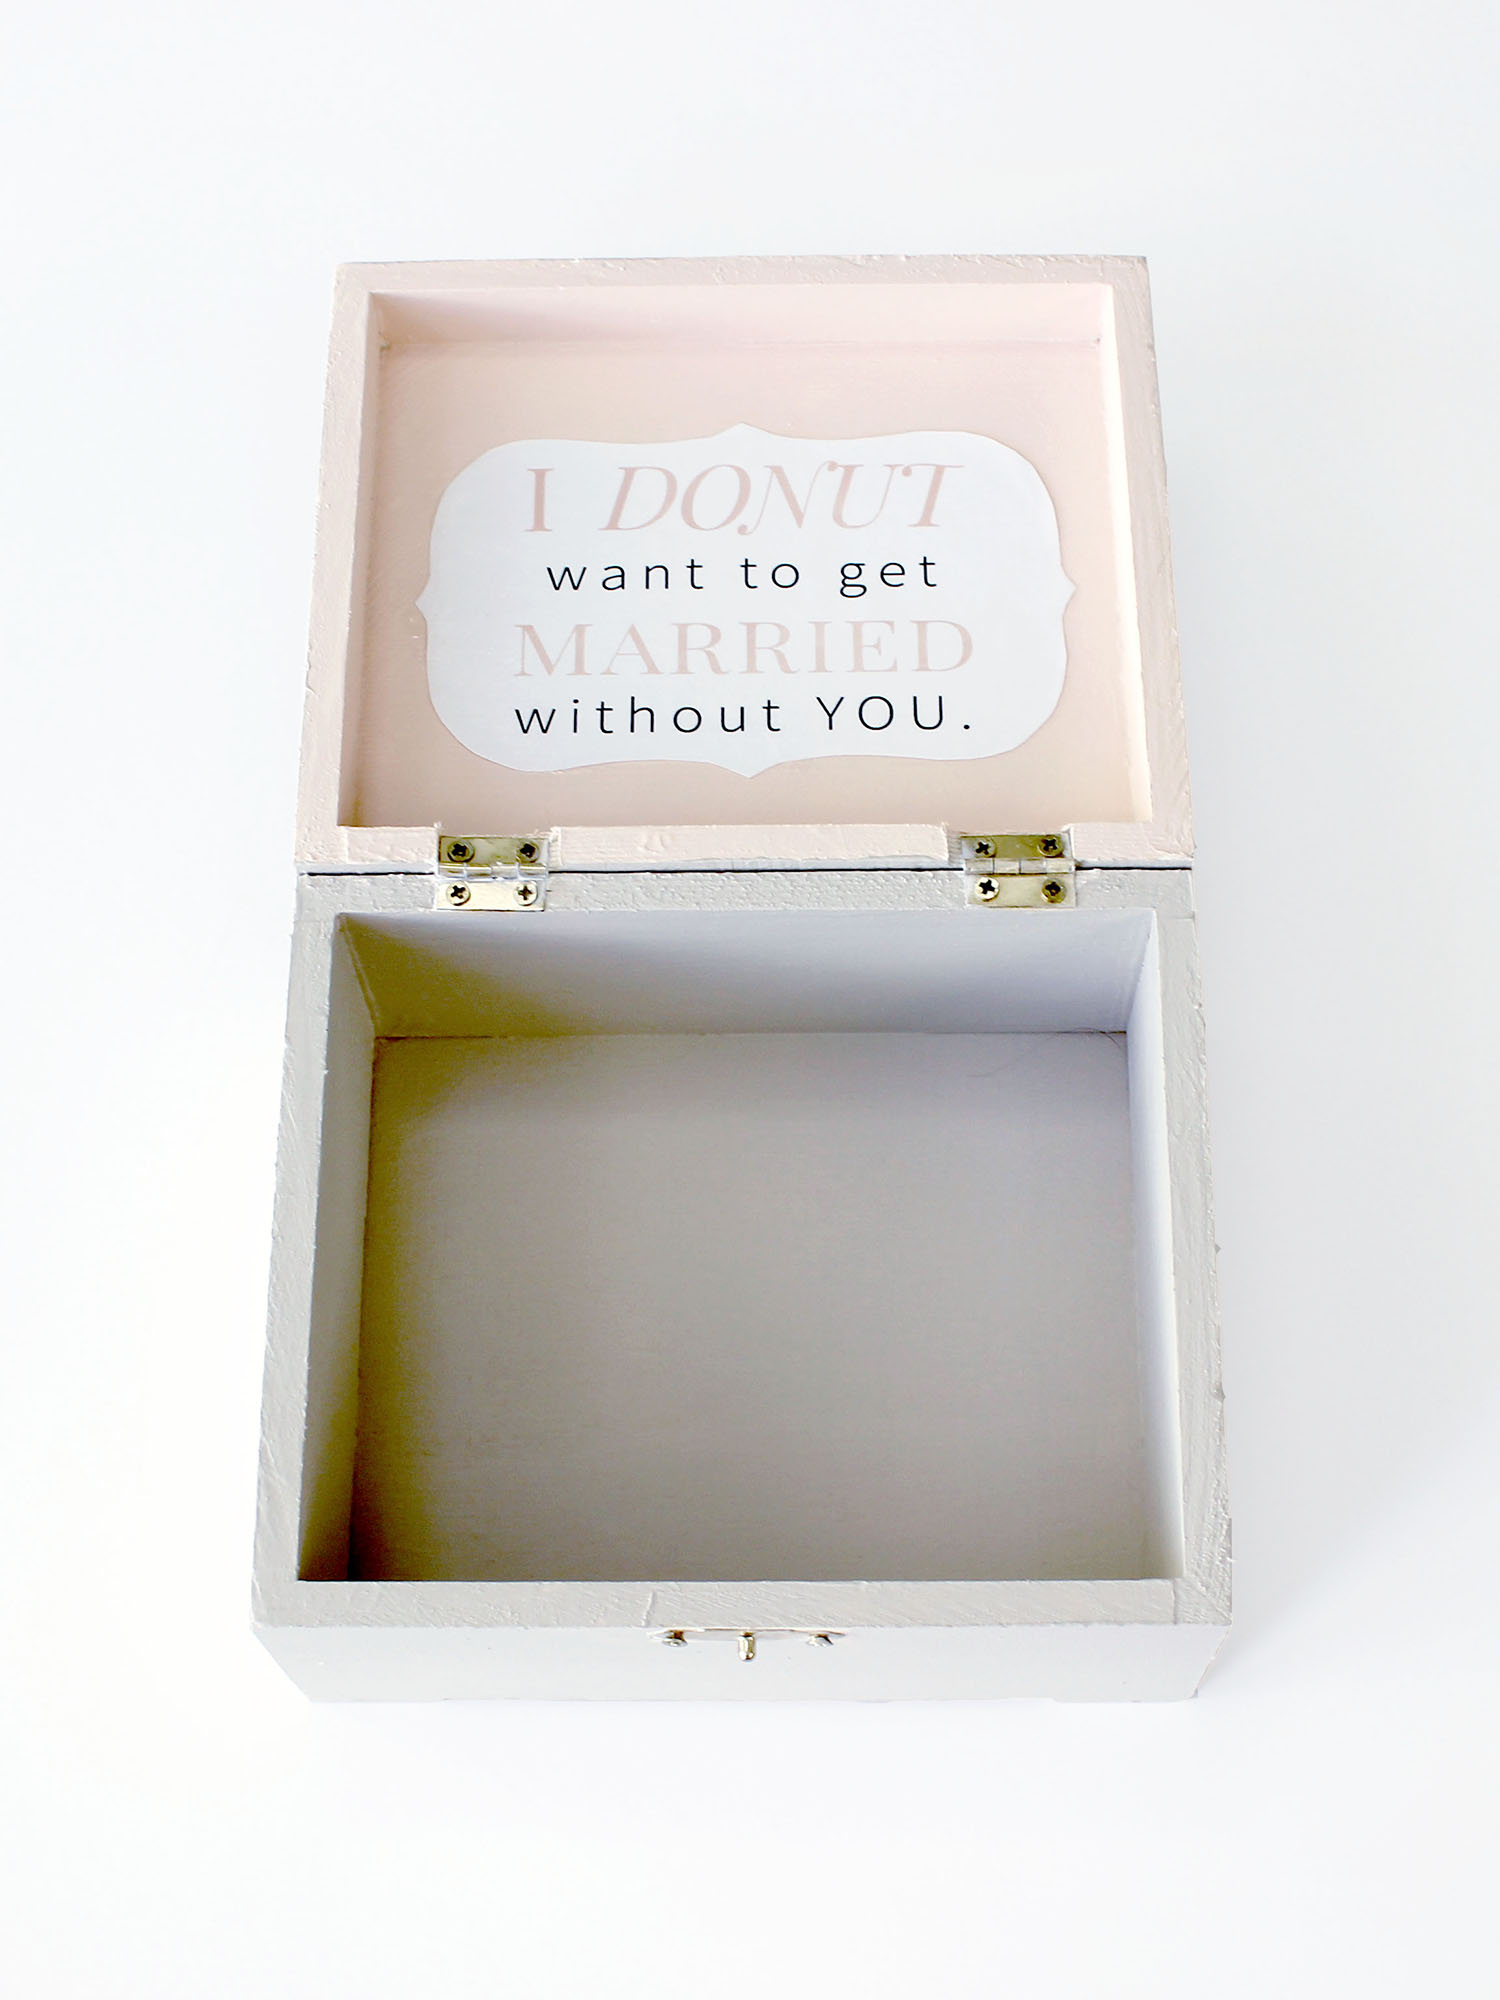
For paint colors, I wanted the boxes to be neutral but also to match our wedding colors of pink, white and gold. I chose a tan paint for the base color and a peachy pink to use on the inside upper lids as an accent color. Use a medium-size paintbrush to add the acrylic paint to your box. You can add coats of paint, letting each dry in between, until you’re happy with the results.
Step 5
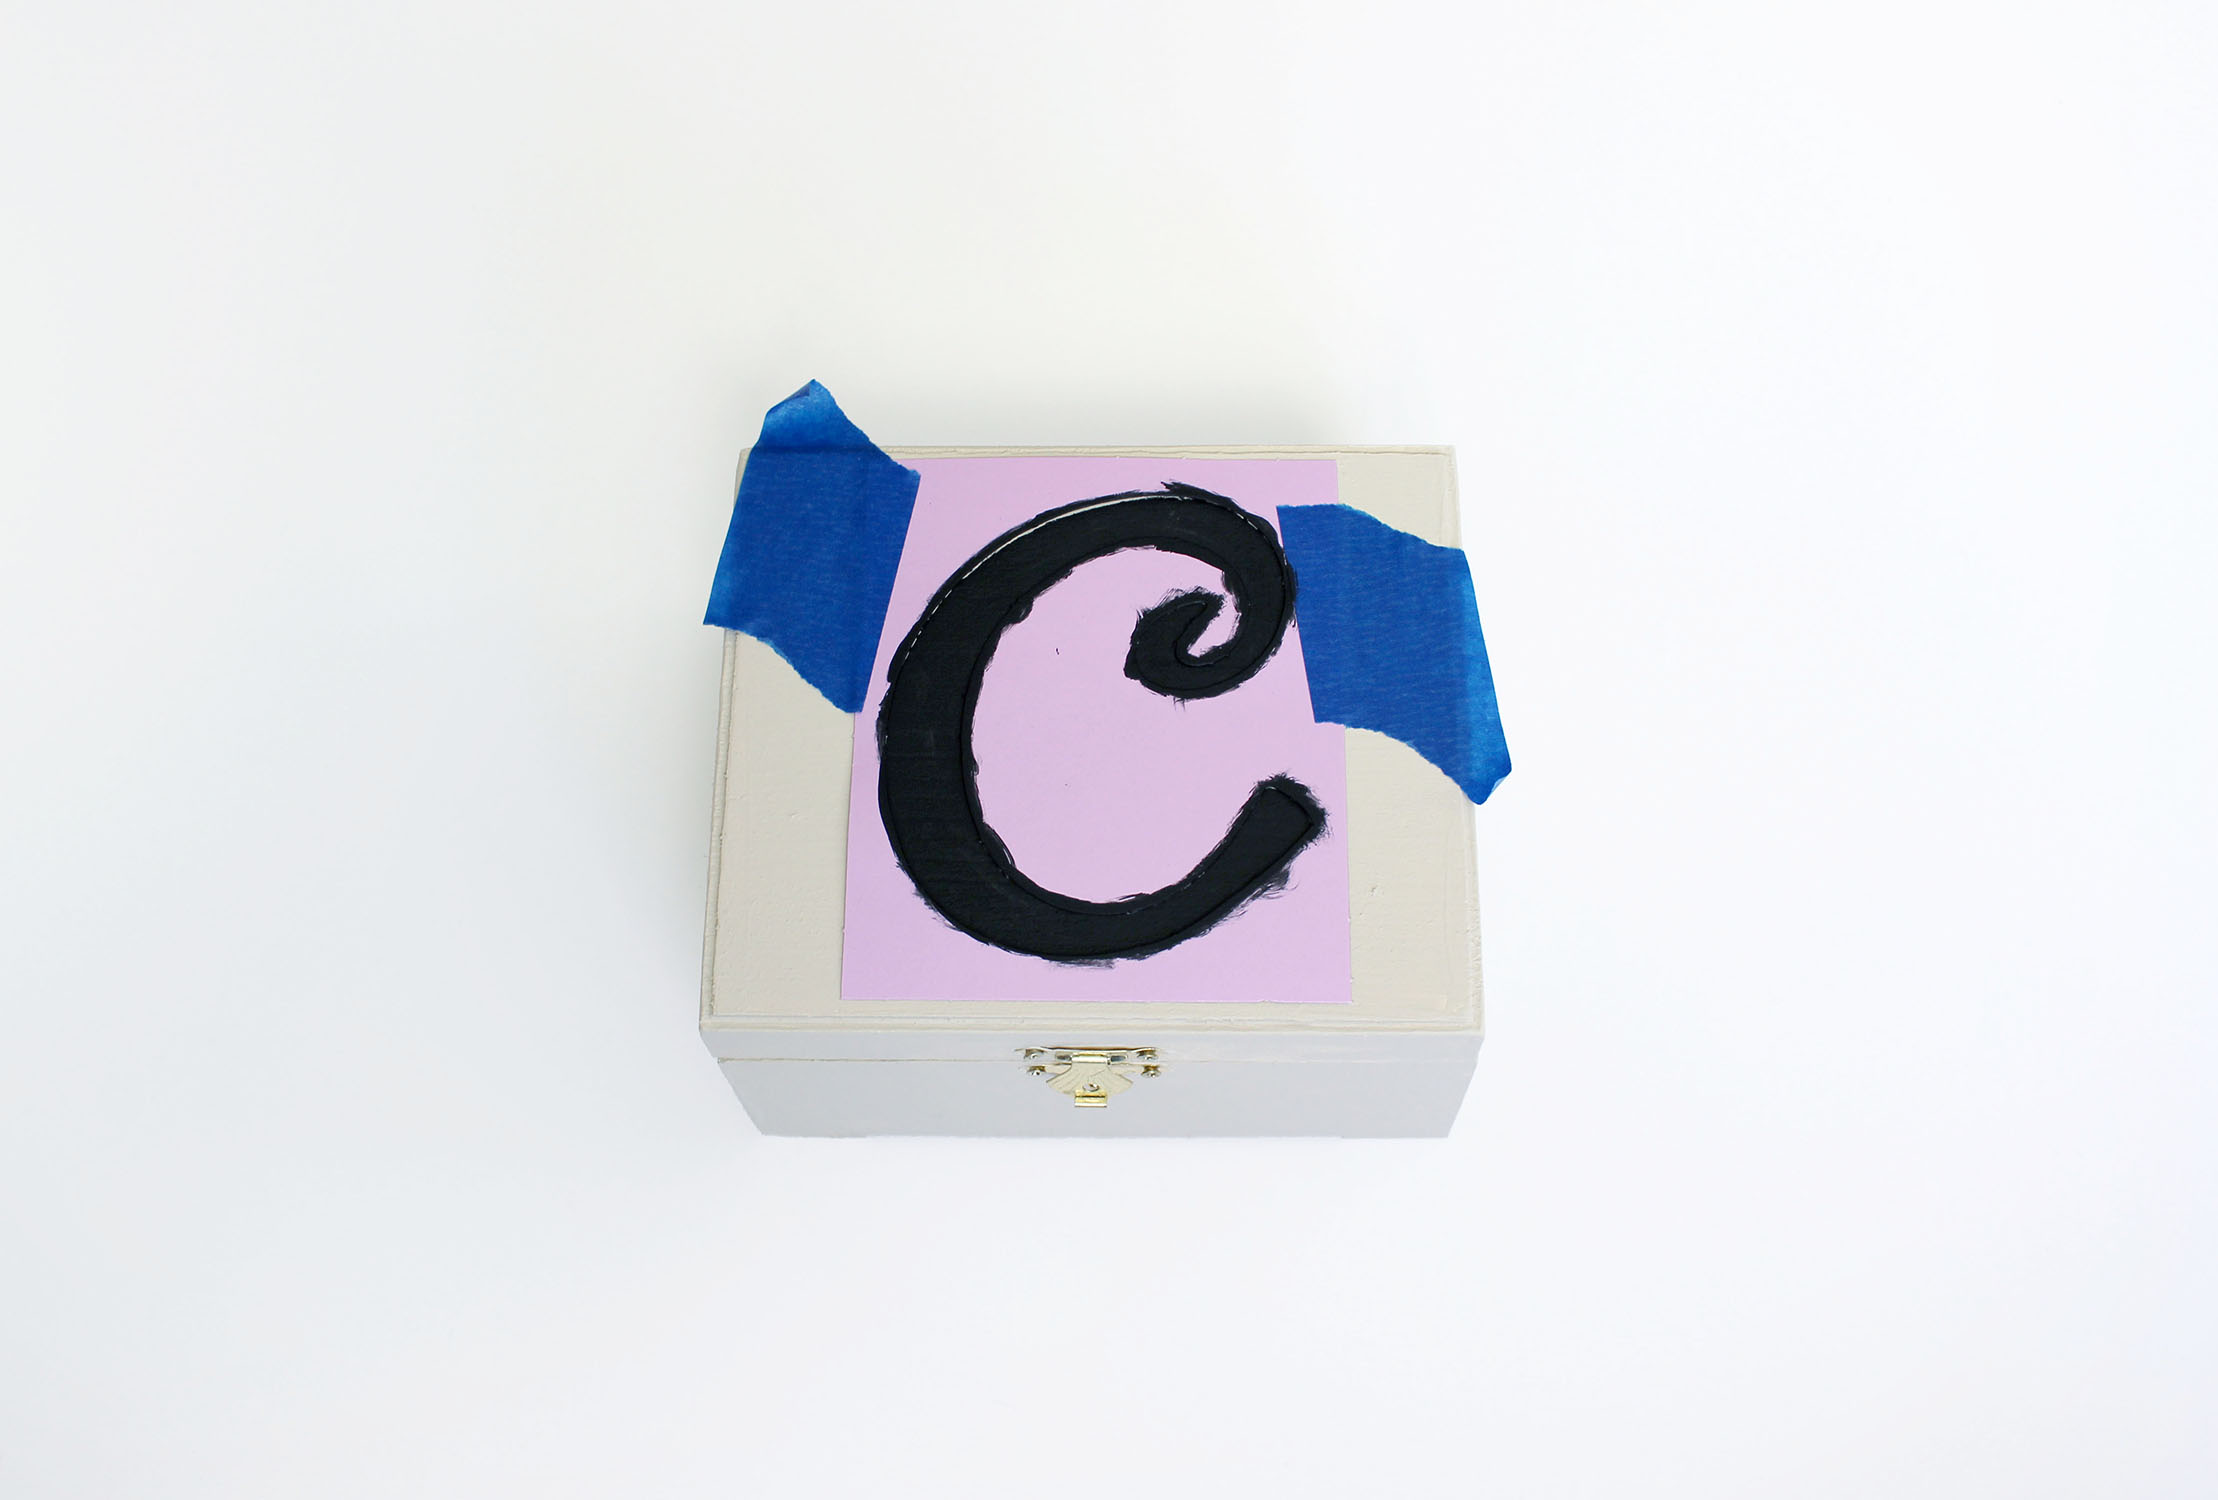
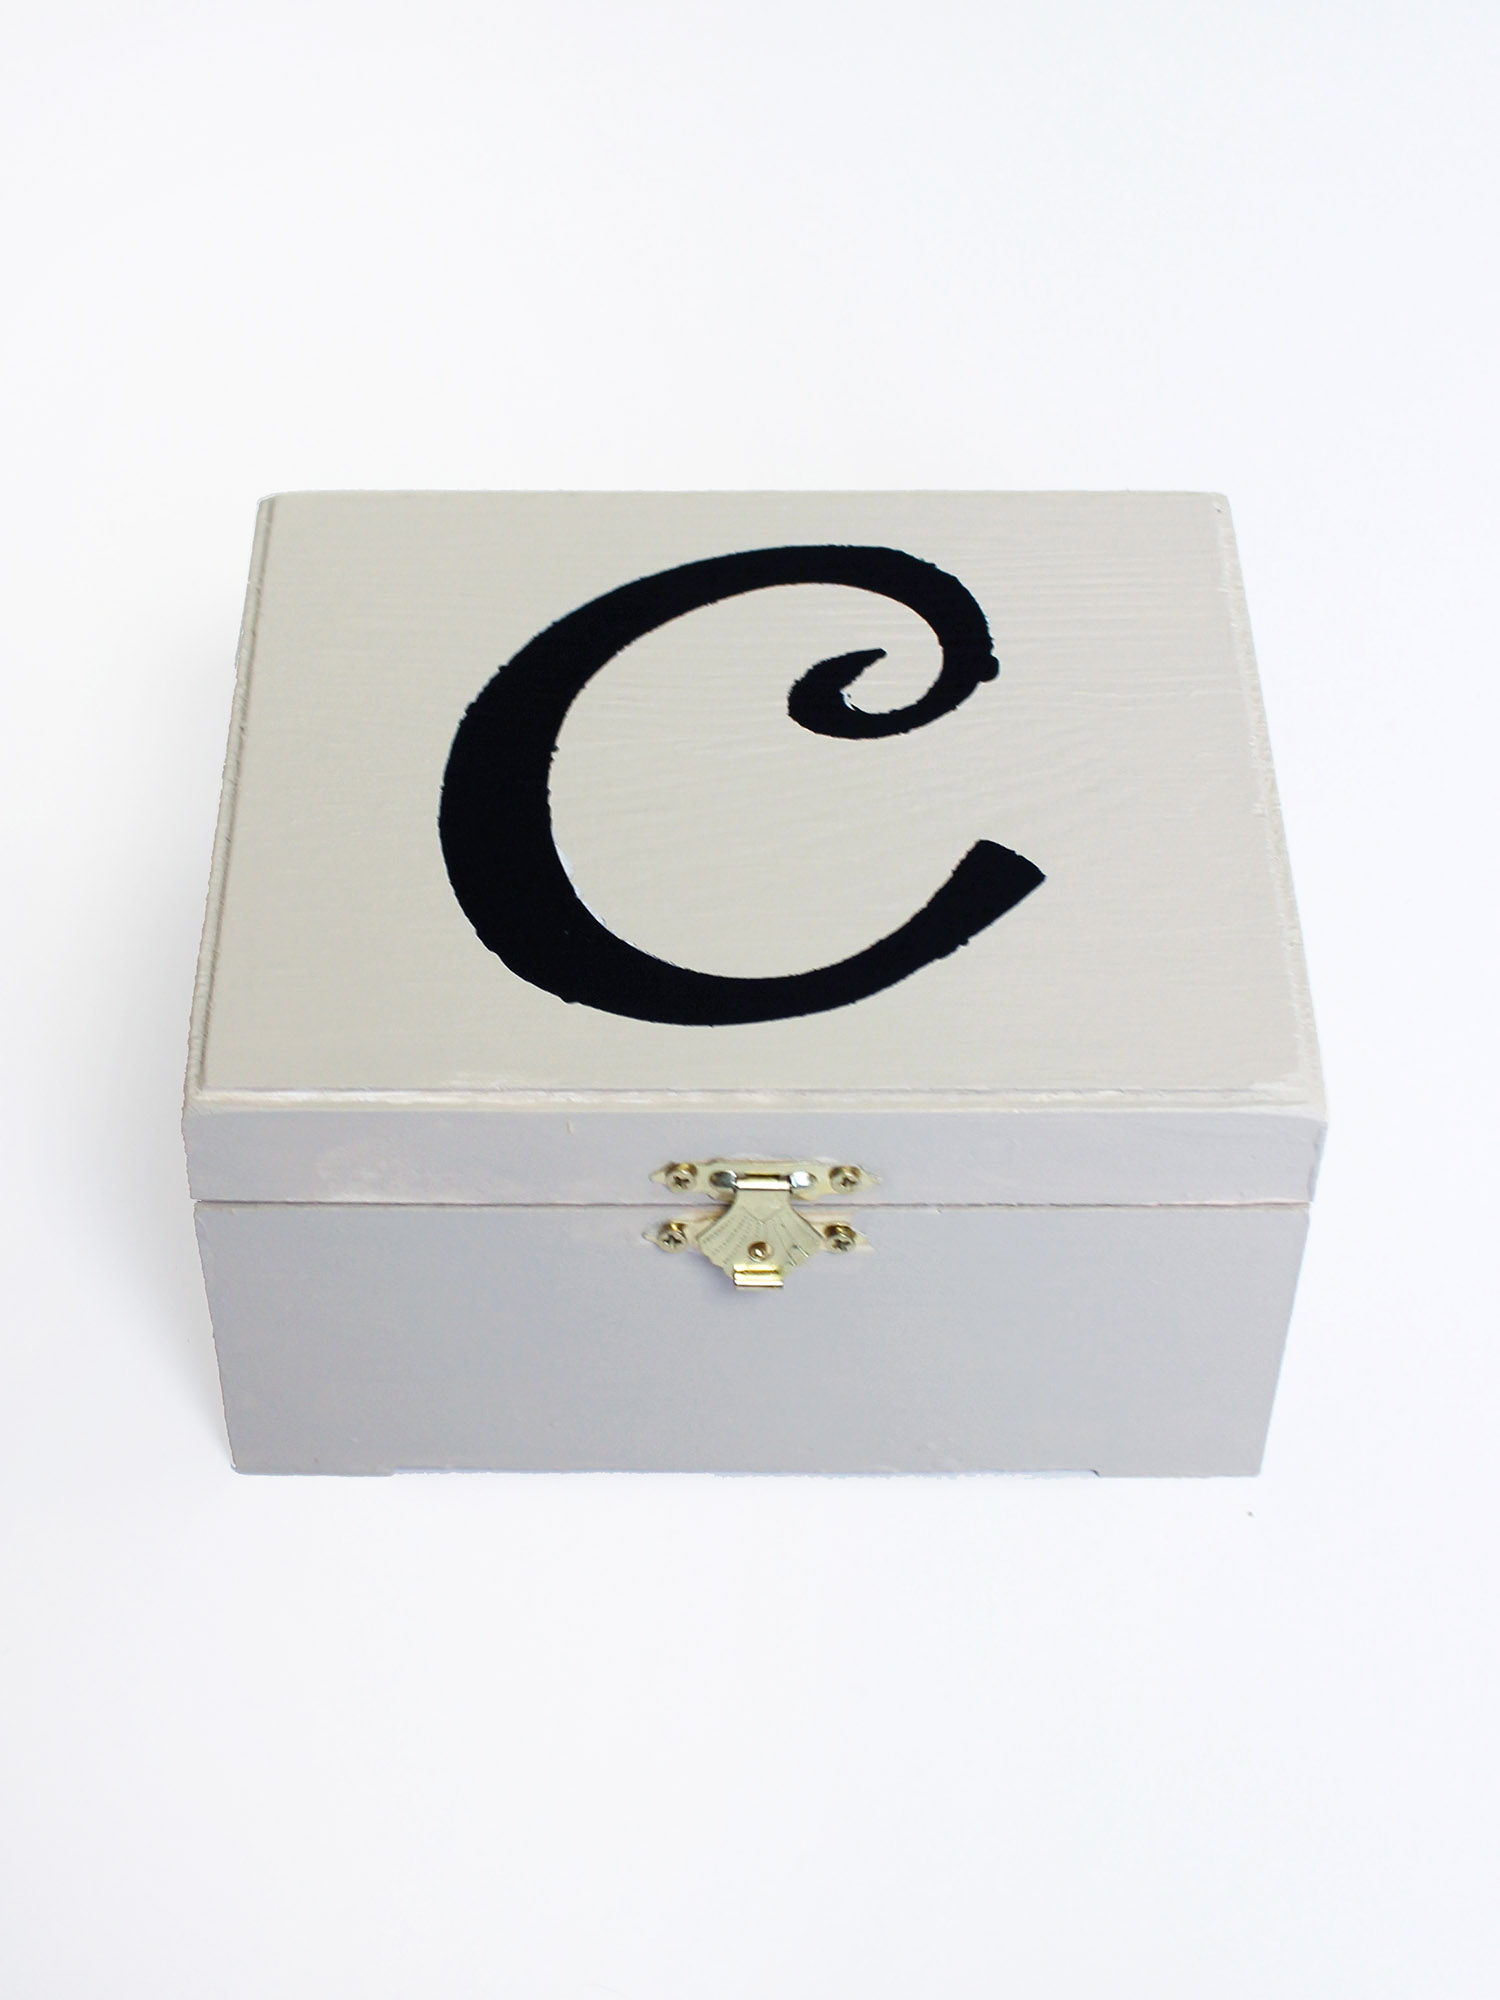
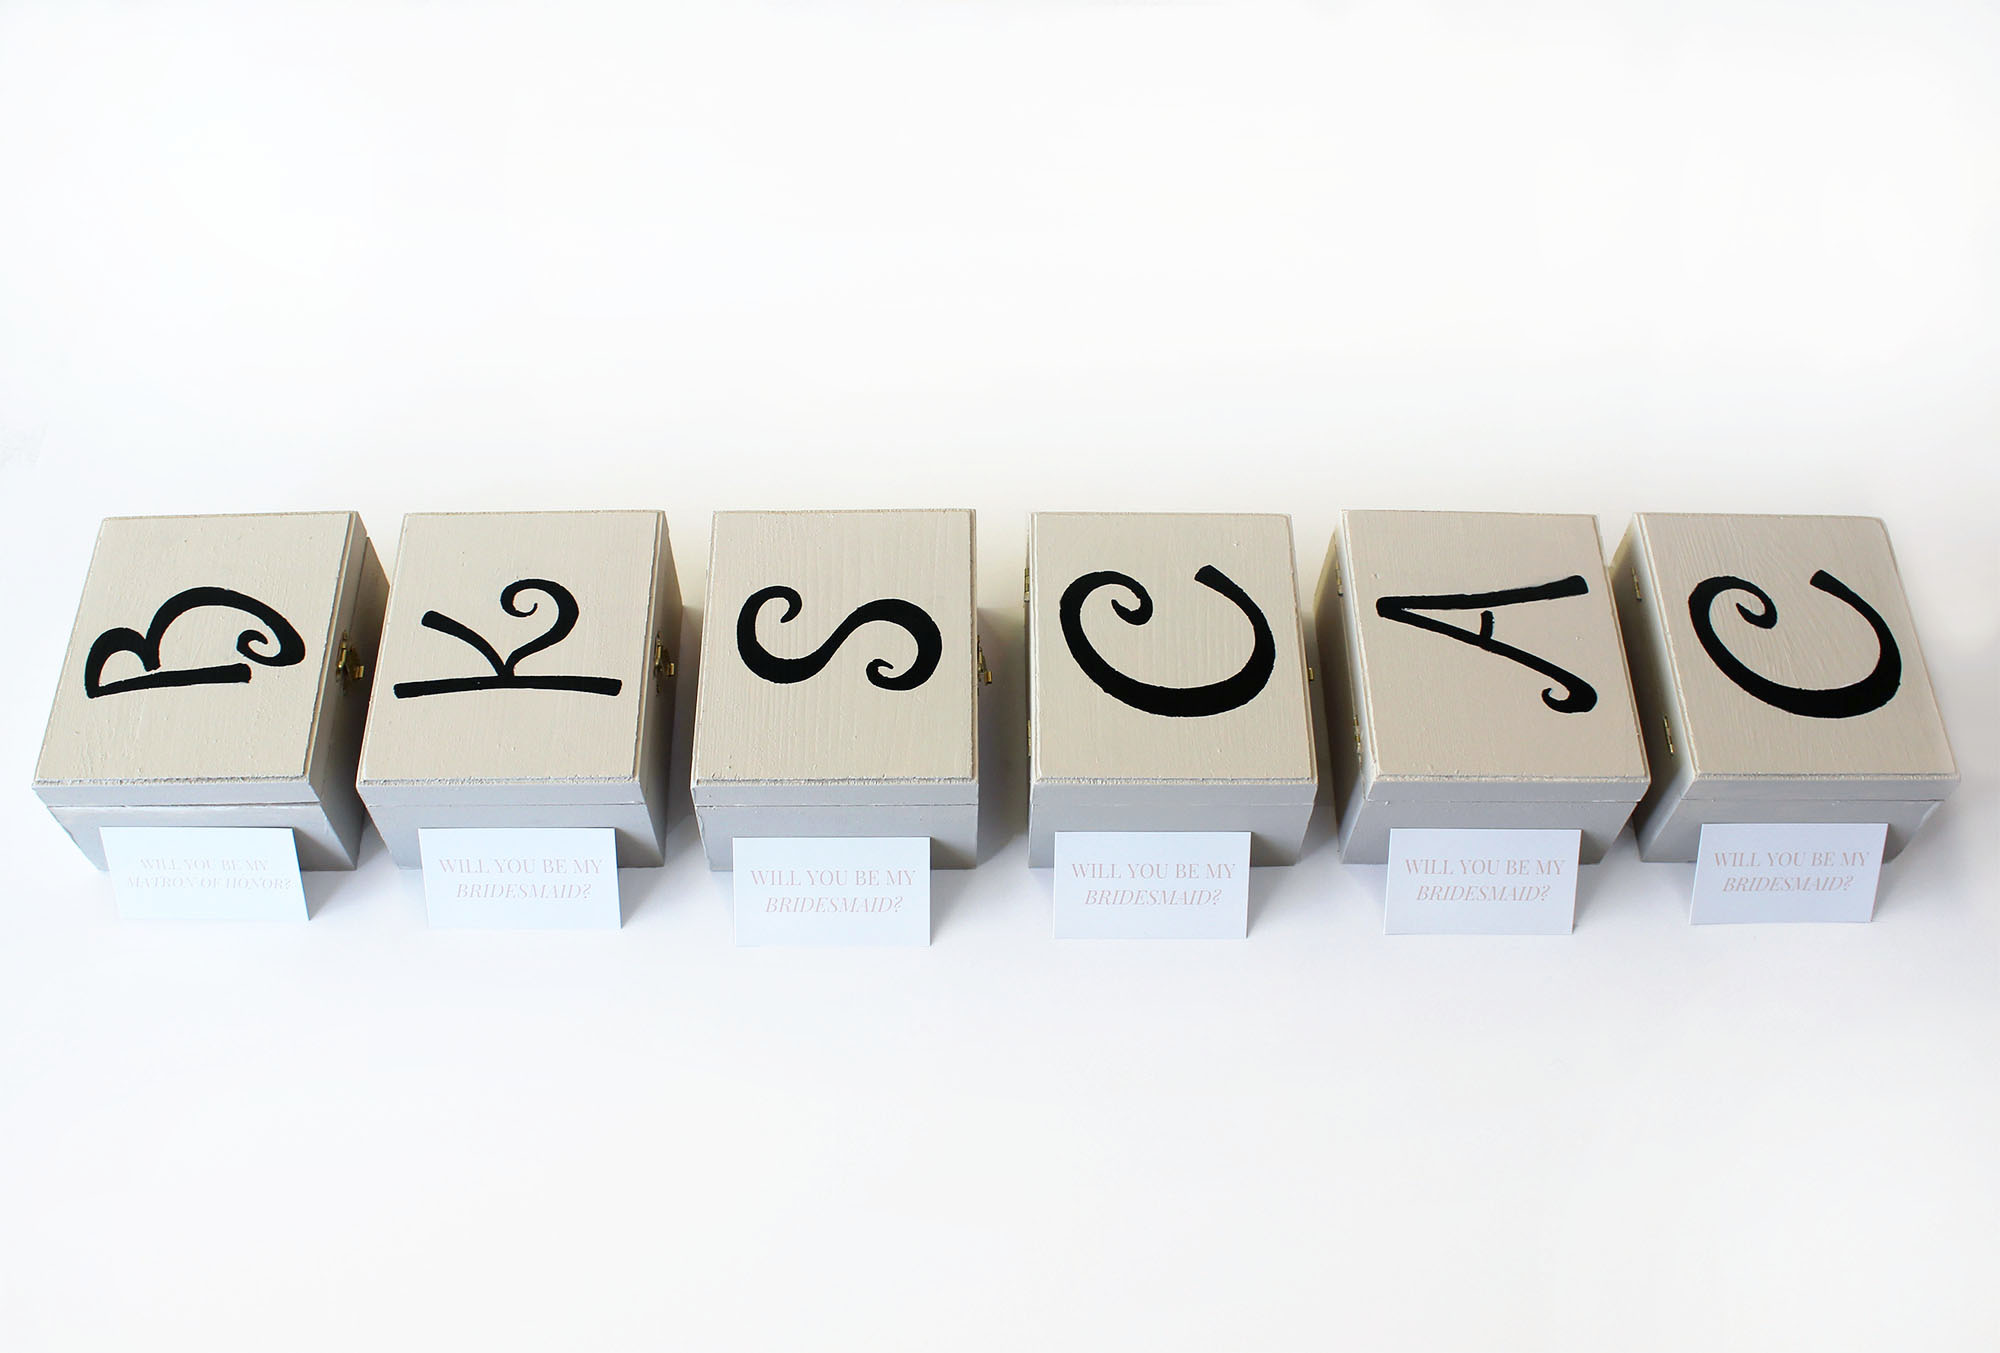
Next, personalize each box using a pack of alphabet stencils. I wanted to keep the boxes simple and decided to paint only each bridesmaid’s first initial on the lid. Doing this instead of adding “bridesmaid” or my wedding date kept the boxes versatile for my bridesmaids. l added the initials to the tops of the boxes using black acrylic paint. Use painters tape to set the stencil in place and then paint the inside black.
Step 6
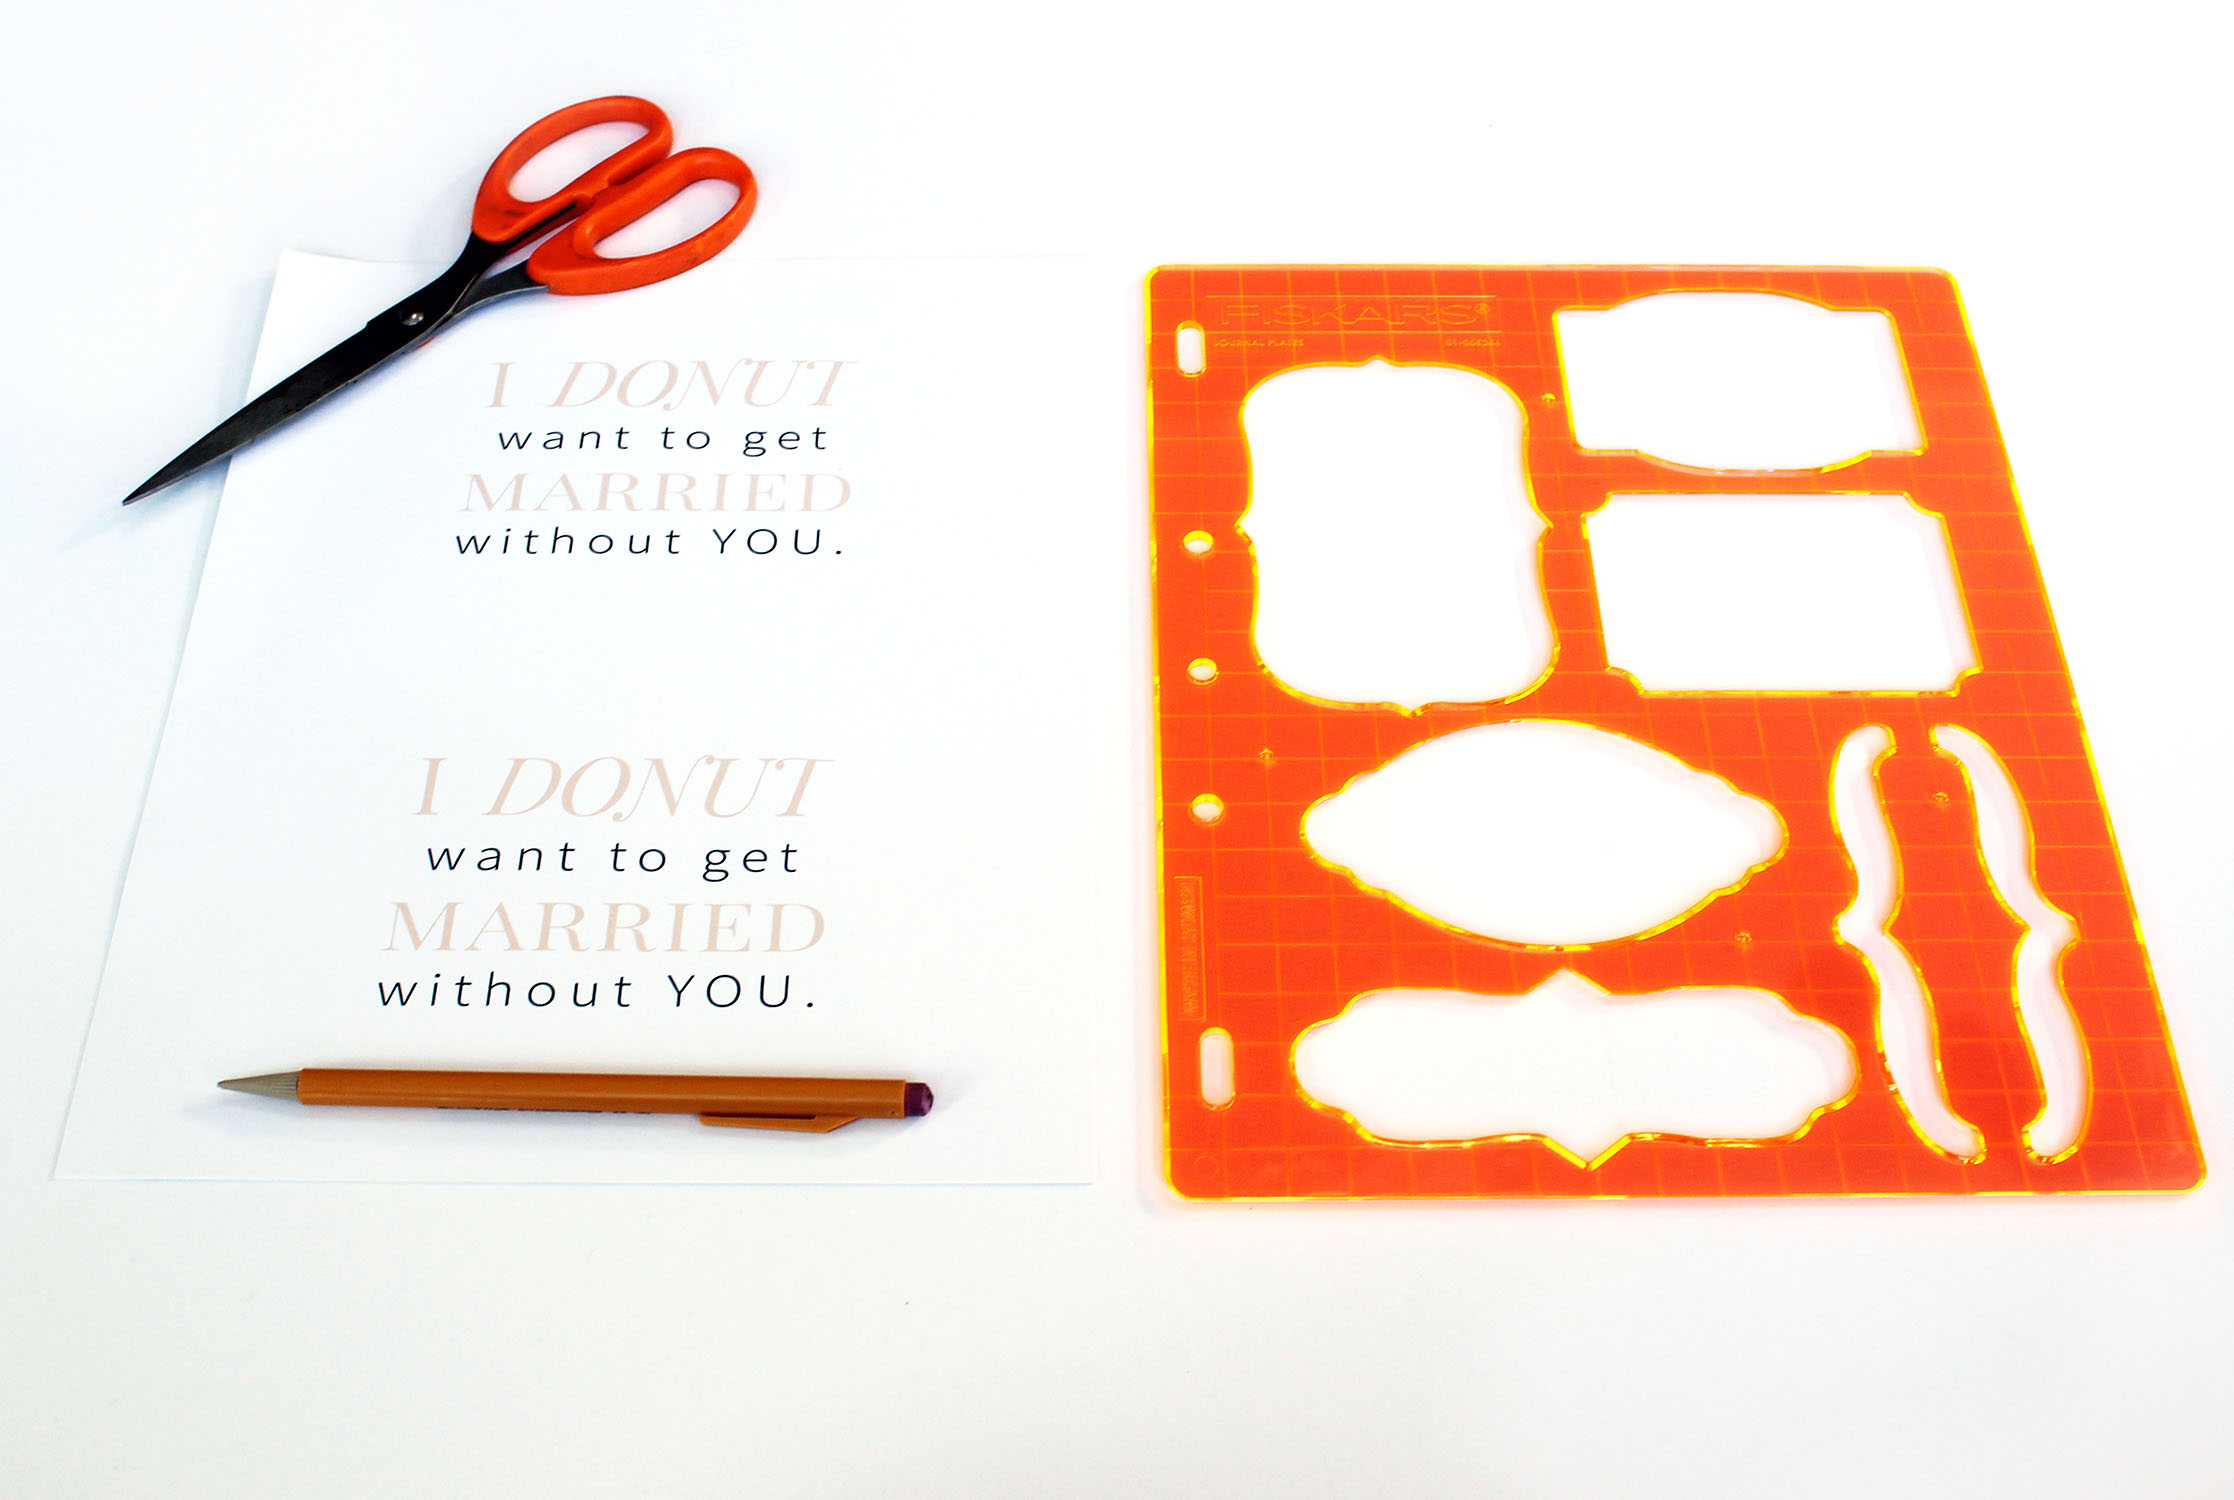
While the black paint dries, create and print out the donut saying and “Will you be my bridesmaid/MOH?” cards on white printer paper. (Download the FREE templates I used here.) I used a stencil to cut out the donut saying and then secured it to the top of the box using Mod Podge. You can cut the bridesmaids/MOH cards into business card-size rectangles. We used my mom’s laminator to laminate the bridesmaids/MOH cards. If you don’t have a laminating machine, I recommend printing the cards out on a thicker paper like cardstock.
Step 7
Once the initials are dry, remove the painters tape to reveal the stenciled letter.
Step 8
Add some confetti and a donut and VOILA! You have super sweet bridesmaids gifts your girls will enjoy eating and then using for years to come.